Self-Watering Planters Explained
How self-watering planters work, which plants thrive in them and which don't, how to size the reservoir for your schedule, and how to set one up right.
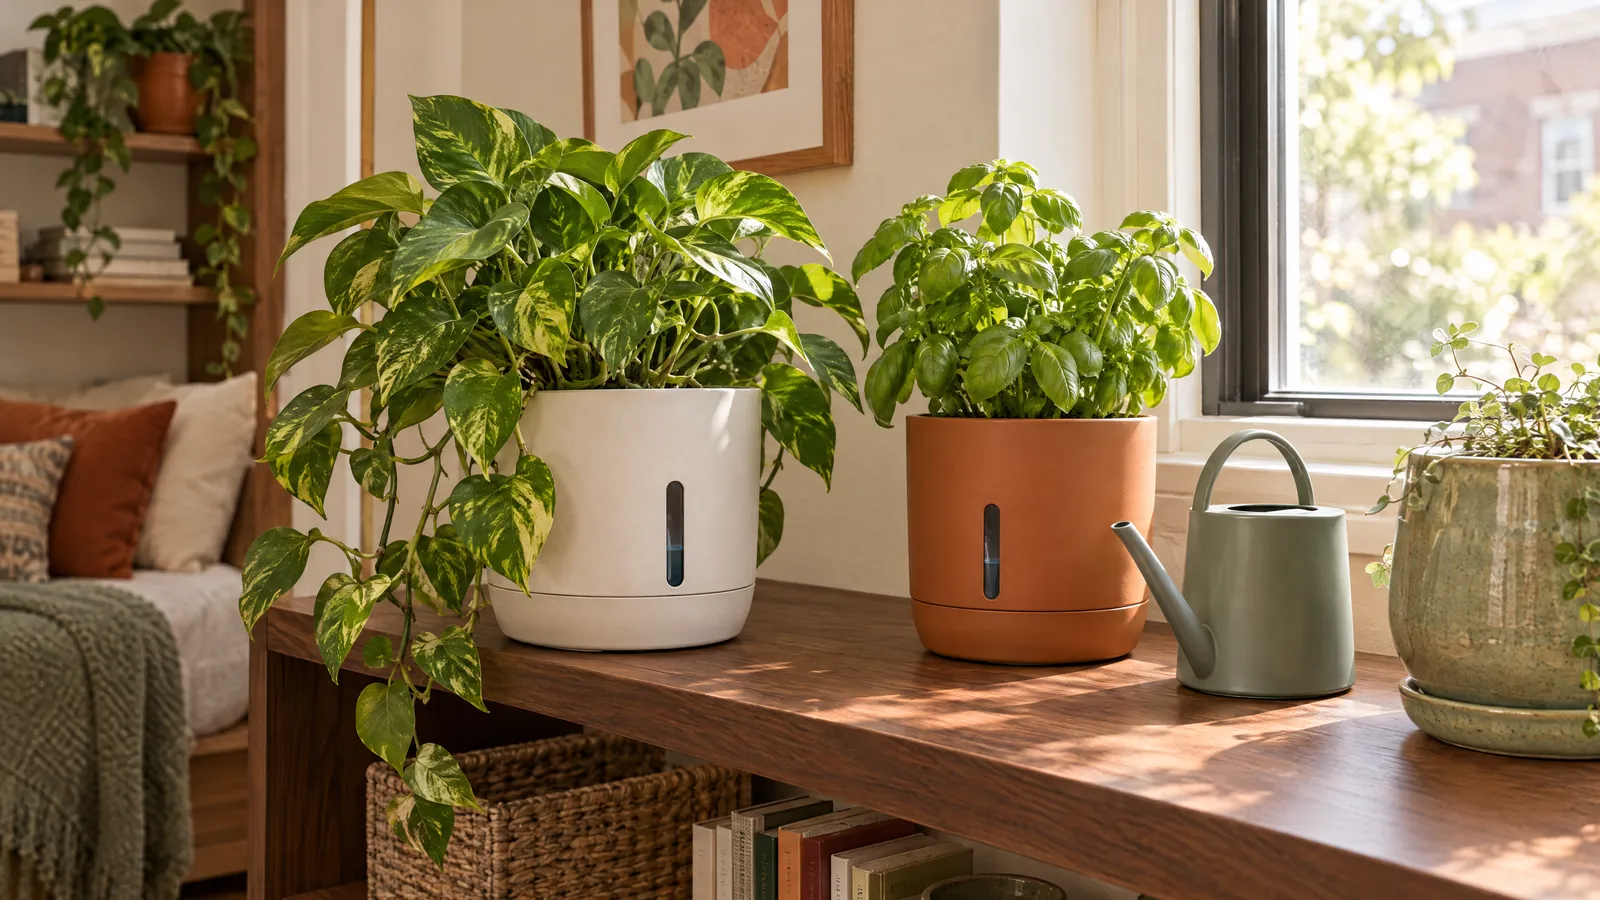
How a self-watering planter works
A self-watering planter waters from below. It holds a reserve of water under the soil and lets the plant draw it up as needed, which evens out the gap between “just watered” and “bone dry.”
Most designs have the same parts:
- A soil chamber on top, where the plant grows.
- A reservoir underneath, separated from the soil by a platform or insert.
- A wick or a wicking column: a fabric cord or a leg of potting mix that reaches down into the water. Capillary action pulls water up into the soil as it dries.
- A fill tube or opening for topping up the reservoir without disturbing the plant.
- An overflow hole at the top of the reservoir, so excess water drains out instead of rising into the root zone.
- A water level indicator on some models, showing when to refill.
What it solves: forgotten waterings, small pots that dry out daily, hot windowsills and sunny balconies, and short trips away.
What it doesn’t: it’s not hands-off forever. You still refill the reservoir, check the plant, and flush the soil now and then.
Which plants like them, and which don’t
Self-watering planters suit plants that like evenly moist soil.
Good matches:
- Leafy herbs such as basil, parsley, chives and mint
- Lettuce, spinach and other salad greens
- Tomatoes and peppers, which suffer when watering is uneven
- Many leafy houseplants, such as pothos, peace lily, spider plant and ferns
Poor matches:
- Succulents and cacti, which want to dry out completely between waterings
- Snake plants and ZZ plants, which rot easily in constantly damp soil
- Orchids grown in bark, which need air around their roots
- Mediterranean herbs such as rosemary and lavender, which prefer drier, sharply drained soil
For plants in between, let the reservoir run empty for a few days before you refill it. That gives the soil a chance to dry slightly.
Step by step: choosing and setting one up
-
Size the pot to the plant. Choose a planter about 1 to 2 inches (2.5 to 5 cm) wider than the root ball for a houseplant. An oversized soil chamber holds more wet mix than the roots can use, and that’s when rot starts. Edibles such as tomatoes need much more room: at least 5 gallons (19 liters) of soil per plant.
-
Size the reservoir for your schedule. Think about your longest usual gap between waterings, such as a weekend away or a busy work week. A small indoor pot typically goes several days to about two weeks on one fill; a large planter in summer sun may need topping up every few days. To check how much a reservoir holds, fill it with a measuring cup. Then fill it, write the date on a piece of tape, and note how many days it takes to empty. That tells you what you can rely on.
-
Use a light, airy potting mix. Water has to wick up through the soil, so use a peat- or coir-based potting mix. Garden soil packs down and stops wicking. Skip mixes with added water-holding crystals; the reservoir already does that job. If the design has a wicking leg, pack it firmly with mix so it touches the water.
-
Water from the top for the first couple of weeks. A new plant’s roots haven’t reached the bottom of the soil yet, and the wick only moistens the lower layers at first. Water the top as well as filling the reservoir until you see steady growth.
-
Fill the reservoir. Pour water into the fill tube until it runs from the overflow hole or the indicator reads full. Set indoor planters on a tray or saucer, since overflow holes are often on the side.
-
Let it run dry sometimes. Once the plant is established, let the reservoir empty and wait a day or two before refilling. Roots need air, and constantly saturated soil invites rot and fungus gnats.
-
Flush the soil every month or two. Fertilizer salts build up because water rarely drains through. A white crust on the soil or the rim is the sign. Water heavily from the top until it runs out of the overflow hole, then empty the reservoir and refill with fresh water.
-
Feed lightly. Nutrients stay in the pot instead of draining away, so use liquid fertilizer at half the label strength, or less often than the label suggests.
Making a pot you already own work
A pot with no drainage hole. If a decorative pot has no hole, a self-watering insert sized to fit inside it gives you a reservoir and keeps roots out of standing water. Measure the inside diameter and depth before you buy an insert. Our guide to glazed ceramic planters covers sizes and how to check for drainage.
A raised planter. Some plastic raised planters have a water reservoir or a drainage plug built in. Check where the overflow drains before you put one on a balcony or a wood floor.
A shallow bowl. Bowl planters hold too little soil depth for a useful reservoir, and they suit succulents better anyway. Water bowl planters by hand, and keep self-watering pots for thirstier plants.
A wick-watering setup. For a short trip, run a cotton or nylon cord from a jar of water into a pot’s drainage hole or into the soil. It’s a stopgap, not a permanent system, so test it for a few days before you leave.
Cleaning and upkeep
Look for an opaque reservoir. Light reaching standing water encourages algae, so a reservoir you can see through tends to turn green. If yours is translucent, keep it out of direct sun or inside a cover pot.
Clean it between plants. When you repot or change plants, empty the planter, scrub the reservoir and platform with warm water and a little mild soap, rinse well and let everything dry before refilling. Replace a fabric wick if it’s stiff, crusty or slimy, since it stops drawing water well.
Check the fill tube. Soil and leaves can fall into it and block the flow. A quick look each time you refill saves a plant from going dry with a full reservoir it can’t reach.
Small-space tips
Use them where watering is awkward. High shelves, crowded windowsills and the far end of a balcony are where a reservoir saves the most hassle.
Remember water weighs a lot. A US gallon of water weighs about 8.3 pounds (3.8 kg). A large outdoor planter with a full reservoir and wet soil is heavy, so on a balcony, keep big ones near the building wall. Our balcony garden guide for beginners covers weight and building rules.
Group plants with similar needs. A row of self-watering herb pots on one sill can be refilled in one round.
Test before you travel. Find out how long the reservoir lasts in your home, in your season, before you trust it with a two-week holiday.
Pick the material for the spot. Plastic planters are light and hold moisture; ceramic is heavier and more stable. Our ceramic vs plastic planters comparison explains the trade-offs.
Mistakes to avoid
- Planting succulents in them. Constant moisture is the opposite of what they want.
- Skipping top watering at the start. A new plant can wilt even with a full reservoir if its roots haven’t reached the wet zone.
- Keeping the reservoir topped up all the time. Let it empty between fills so roots get air.
- Using garden soil or very coarse mix. Dense soil won’t breathe, and very chunky mix won’t wick.
- Blocking the overflow hole. Outdoors, rain can fill the soil chamber and drown the roots. Choose outdoor planters with a working overflow.
- Forgetting to flush. Salt buildup burns roots and leaves brown leaf tips.
- Leaving water in an outdoor reservoir over winter. Water that freezes can crack the planter. Drain it before the first frost.
Questions people ask
How do self-watering planters work?
A self-watering planter has two parts: a soil chamber on top and a water reservoir underneath, separated by a platform. A wick, or a column of potting mix that reaches down into the water, draws moisture up into the soil as it dries out. You top up the reservoir through a fill tube, and an overflow hole stops the water from rising high enough to drown the roots.
Can you put succulents in a self-watering planter?
It's usually a poor match. Succulents and cacti like their soil to dry out completely between waterings, and a self-watering planter is designed to keep soil evenly moist, which can lead to root rot. If you want to try it, use a very gritty mix, fill the reservoir only occasionally and let it stay empty for long stretches. A regular pot with a drainage hole is simpler.
How long does a self-watering planter go between refills?
It depends on the reservoir size, the plant, the light and the temperature. A small indoor pot often lasts several days to about two weeks, while a large planter in summer sun may need topping up every few days. The reliable way to find out is to fill it, note the date and check the water level indicator until it reads empty. Do this before you rely on it for a trip.
Why do self-watering planters cause root rot?
Usually because the reservoir is kept full all the time, the soil is too dense, or the plant prefers drier conditions. Roots need air as well as water. Let the reservoir run dry for a day or two before refilling, use a light, airy potting mix rather than garden soil, keep the overflow hole clear, and save these planters for plants that like consistently moist soil.