How to Hang a Gallery Wall
How to hang a gallery wall: plan the layout on paper, center it at 57 inches, keep 2- to 3-inch gaps and pick hardware by weight, plus options for rental walls.
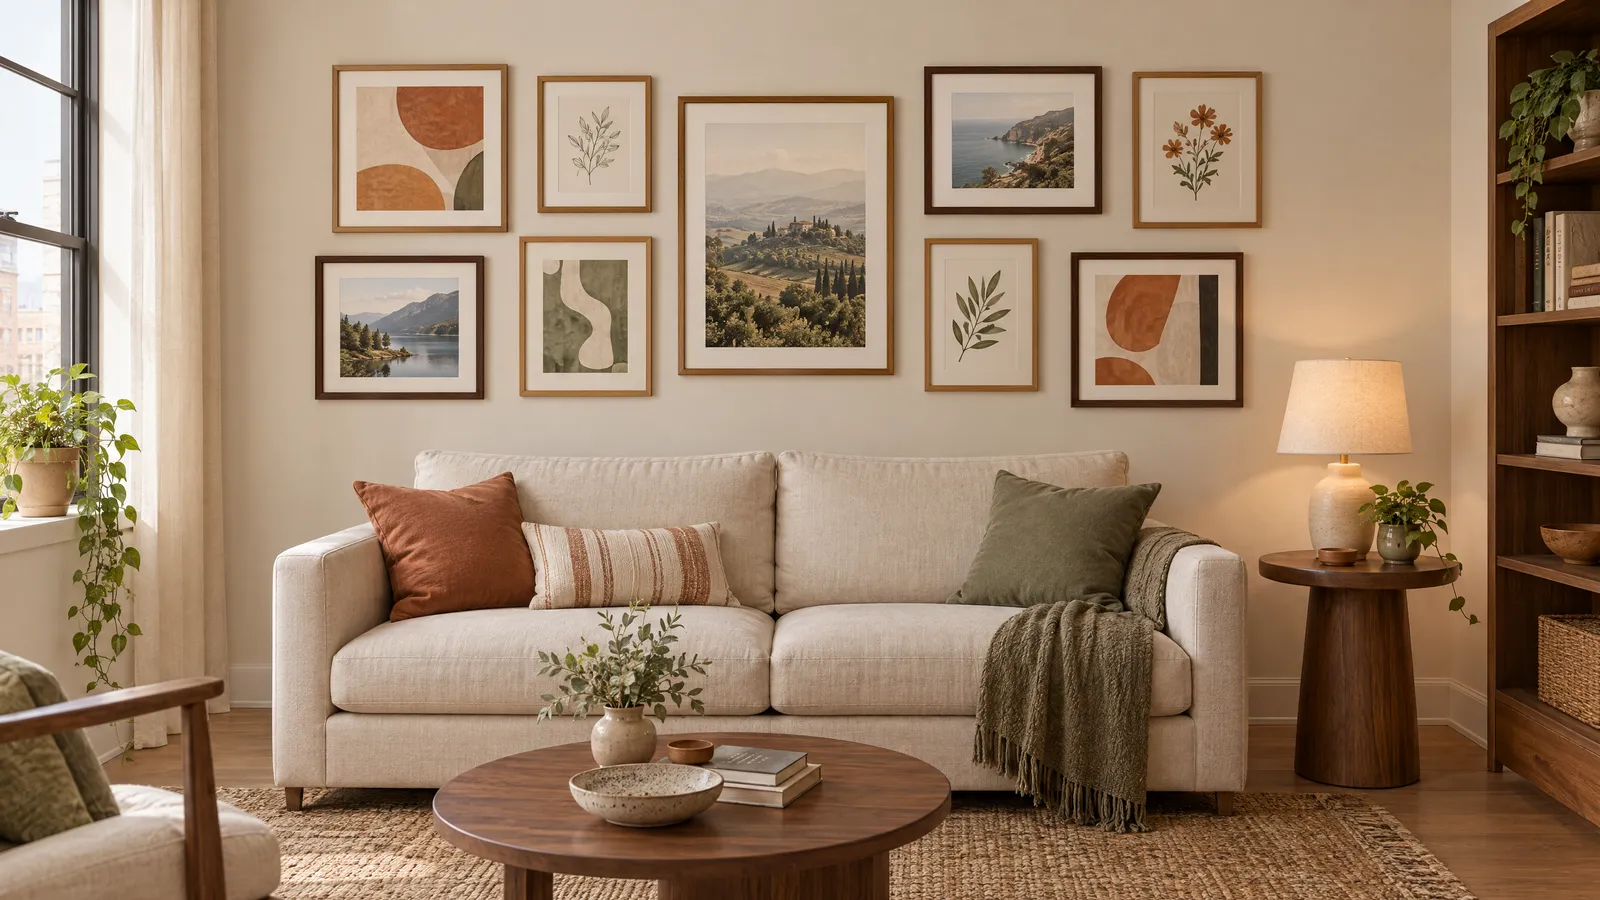
Before you start
A gallery wall looks deliberate when three things stay consistent: the height of the group, the gaps between frames, and one shared element, such as frame color, mat color or a straight outer edge. Get those right and the frames themselves can vary in size and style.
Start by measuring the wall and any furniture below it. Over a sofa, bed or console, the whole arrangement usually looks right at about two-thirds of the furniture’s width, so an 84-inch (213 cm) sofa takes a gallery about 56 inches (142 cm) wide. On an open wall, center the group on the wall itself, or on the spot where you naturally look as you walk past.
What you need
- A tape measure, a pencil and a level (a phone level works)
- Painter’s tape, scissors and kraft paper or old wrapping paper
- A hammer, plus hooks, nails or anchors rated for each frame’s weight
- A kitchen or bathroom scale to weigh heavier frames
- A stud finder for anything heavy, and felt bumpers or removable putty for the bottom corners
Choose a layout
- Grid. Same-size frames in rows with equal gaps, such as nine 8x10 frames in a 3-by-3 block. It looks calm and suits small rooms and photos of mixed subjects.
- Salon. Mixed sizes with an uneven outer edge but even gaps inside. Start with the largest piece slightly off center and build outward, balancing dark and light pieces on each side.
- Line. Frames share one center line, or a top or bottom edge. It is the easiest layout for hallways and above long, low furniture.
Pick frame sizes that work together
Common frame sizes are 4x6, 5x7, 8x10, 11x14, 16x20 and 18x24 inches. For a salon layout, choose one anchor piece that is clearly the largest, about two to three times the size of your smallest frames, and fill around it with two or three in-between sizes. Too many sizes close together look like a mistake rather than a choice.
Mats help small prints hold their own. A mat 2 to 3 inches (5 to 8 cm) wide around a 5x7 photo makes it read as an 8x10 or 11x14 on the wall. Using the same mat color across mixed frames is one of the easiest ways to give a gallery wall its shared element.
Step by step
-
Gather and weigh everything. Collect the frames you want to use and decide on the shared element. Weigh anything larger than about 11x14 inches or anything with glass, and write the weight on the back with the hanging type: sawtooth, D-rings or wire.
-
Lay it out on the floor. Mark a rectangle on the floor with painter’s tape the size of the finished area. Arrange the frames inside it, starting with the largest, and keep 2 to 3 inches (5 to 8 cm) between them. Take a photo from above, try one or two alternatives, and pick your favorite.
-
Make paper templates. Trace each frame on paper, cut it out and write which frame it is. On the back of each frame, measure from the top edge to the hanging point. For a wire, pull it taut toward the top as it will hang and measure to the peak. Mark that point on the template.
-
Tape the templates to the wall. Arrange them to match your photo, with the center of the whole group about 57 inches (145 cm) from the floor. Above furniture, keep the lowest frame 8 to 10 inches (20 to 25 cm) above the back of the sofa or the top of the console. Check the gaps with a cardboard spacer cut to your chosen width, then leave the templates up for a day and adjust.
-
Pick hardware for each frame. Read the weight rating on the package and choose hardware rated above the frame’s weight. Light frames on drywall can hang on angled nail-in picture hooks. Heavier frames should go into a stud (studs are usually 16 inches, or 41 cm, apart) or on drywall anchors rated for the load. On plaster, drill a small pilot hole first so the wall doesn’t crack, and on brick, use a masonry bit and plugs. Frames wider than about 24 inches (61 cm) hang straighter on two hooks.
-
Hang through the paper. Put the nail or hook straight through the mark on each template, then tear the paper away. Hang the largest or central frame first and work outward, so small errors don’t stack up across the wall.
-
Level and secure. Level each frame, then check the gaps again with your spacer. Add felt bumpers or a small dot of removable putty to the bottom corners so frames don’t tilt when doors close or someone brushes past.
Marking hooks by hanger type
The back of each frame decides where the hook goes. Measure carefully: a mistake here puts the frame in the wrong place even when the template is right.
| Hanger on the frame | How many hooks | What to mark on the template |
|---|---|---|
| Sawtooth | One | The center of the sawtooth, measured down from the top edge |
| Single D-ring or keyhole | One | The top of the ring or slot, measured down from the top edge |
| Two D-rings | Two | Both ring positions: the distance between them and the drop from the top edge |
| Wire | One for small frames, two for wide ones | The peak of the wire pulled taut, or two points about a third of the way in from each side |
Two hooks on a wire or two D-rings keep a frame level on its own, so you spend less time straightening it after every door slam.
Safety notes
- Over a bed or the back of a sofa where heads rest, use light frames with acrylic instead of glass, hang them on two hooks, and skip the heaviest pieces.
- Don’t hang frames above a crib or a baby’s sleep space at all.
- If you live in an earthquake-prone area, closed hooks and putty on the bottom corners help keep frames on the wall.
- Before drilling, check for wires and pipes. They often run straight up and down from outlets and switches.
Small-space tips
- Go vertical on narrow walls. A single column of three to five frames, 2 inches apart, fits a slim wall between doors and draws the eye up, which can make a low ceiling feel taller.
- Follow the slope on stairs. Keep each frame’s center about 57 inches above the stair tread directly below it, so the group climbs with the steps.
- Use fewer holes. A collage picture frame holds several photos on one or two hooks, and a picture ledge lets you lean and swap frames without new holes.
- Group small frames tightly. Small frames such as 4x6 wood picture frames can look scattered on a big wall. Hang them in a tight grid at 2-inch gaps so they read as one piece.
- Try a string display. For cards, instant photos and kids’ art, a photo string display with clips needs two small hooks and changes in seconds.
- Check your lease. Read it before you hammer; small nail holes usually fill with a dab of spackle when you move out. Our guide to renter-friendly wall decor covers more options that leave walls as you found them.
Mistakes to avoid
- Hanging too high. It is an easy mistake, especially with tall ceilings. Keep the center of the group near 57 inches, not near the ceiling.
- Uneven gaps. A gap of 2 inches in one spot and 4 in another looks accidental. Use a spacer every time.
- A group that’s too small. A few small frames above a large sofa look lost. Aim for about two-thirds of the furniture’s width.
- Choosing hardware by eye. A small hook can look strong enough and not be. Go by the weight rating on the package.
- Skipping the templates. Hammering straight into the wall usually means extra holes to fill later.
- No shared element. Mixed frames, mats and finishes with nothing in common read as clutter. Keep one thing the same.
Questions people ask
How high should a gallery wall be hung?
Hang it so the center of the whole group sits about 57 inches (145 cm) from the floor, the eye-level height galleries commonly use. Treat the arrangement as one large picture and find the center of the group, not of each frame. Above a sofa or console, keep the lowest frame about 8 to 10 inches above the furniture, even if that lifts the center a little higher.
How far apart should frames be on a gallery wall?
Two to three inches (5 to 8 cm) is the common guidance. Closer than that looks cramped, and much wider makes the frames read as separate pieces instead of one group. What matters most is keeping the gap the same everywhere. Cut a strip of cardboard to your chosen width and use it as a spacer when you tape up templates and hang. Small frames look best at the tighter end.
How do I hang a gallery wall without damaging the walls?
Use options that leave few or no holes. A collage frame holds several photos on one or two hooks, a picture ledge needs only a few screws, and a photo string display with clips needs two small hooks. Adhesive strips suit light frames on smooth painted walls if you follow the weight rating and instructions on the package, but they can lift paint when removed. Small nail holes usually patch easily with spackle.
What hardware should I use for heavy frames?
Weigh the frame, then choose hardware whose package weight rating is comfortably above that number. Screw into a wall stud when you can; studs are usually 16 inches apart. Away from a stud, use drywall anchors rated for the load, and use two hooks on wide or heavy frames so they share the weight and stay level. On plaster or brick, use hardware made for that wall and drill a pilot hole first.